> ## Documentation Index
> Fetch the complete documentation index at: https://dpos.xdr.ooo/llms.txt
> Use this file to discover all available pages before exploring further.
# 2. Ubuntu 24.04 서버 설치
> 충분한 디스크 공간, SSH 접속, 정상적인 Root Filesystem을 갖춘 Ubuntu 24.04 Mirror Server를 설치합니다.
# 2. Ubuntu 24.04 서버 설치
새 Mirror Server를 구축할 때 이 페이지를 사용하십시오. Ubuntu 24.04가 이미 설치되고 검증된 서버가 있다면 **Mirror Server 설치 및 준비** 단계로 진행하십시오.
## 구축할 서버 사양
깨끗한 **Ubuntu 24.04 LTS amd64** 서버를 사용합니다. 현재 검증된 최소/권장 기준은 다음과 같습니다.
| 항목 | 요구사항 |
| ------------------ | --------------------------- |
| CPU | 최소 2 vCPU, 권장 4 vCPU |
| Memory | 최소 4 GB, 권장 8 GB |
| Disk | 현재 Artifact 기준 **총 100 GB** |
| Network | 모든 대상 DP에서 접근 가능한 고정 IPv4 |
| DP → Mirror Server | TCP 80 |
| 관리 | SSH 접속 권장 |
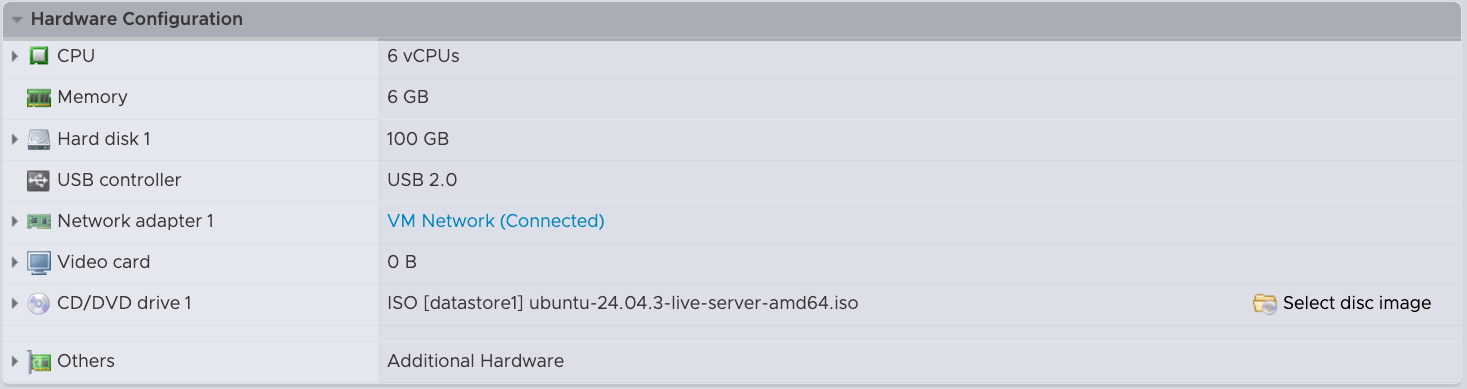
아래 Screenshot은 100 GB Disk, 6 vCPU, 6 GB RAM VM을 예로 사용합니다. 이 값은 예시이며 위의 현재 요구사항을 대체하지 않습니다.
## Step 1 — VM 생성 및 Ubuntu 24.04 ISO 연결
VM을 생성하고 Ubuntu 24.04 Server ISO를 연결한 뒤 Disk가 최소 100 GB인지 확인합니다.
 ## Step 2 — Ubuntu Server Installer 시작
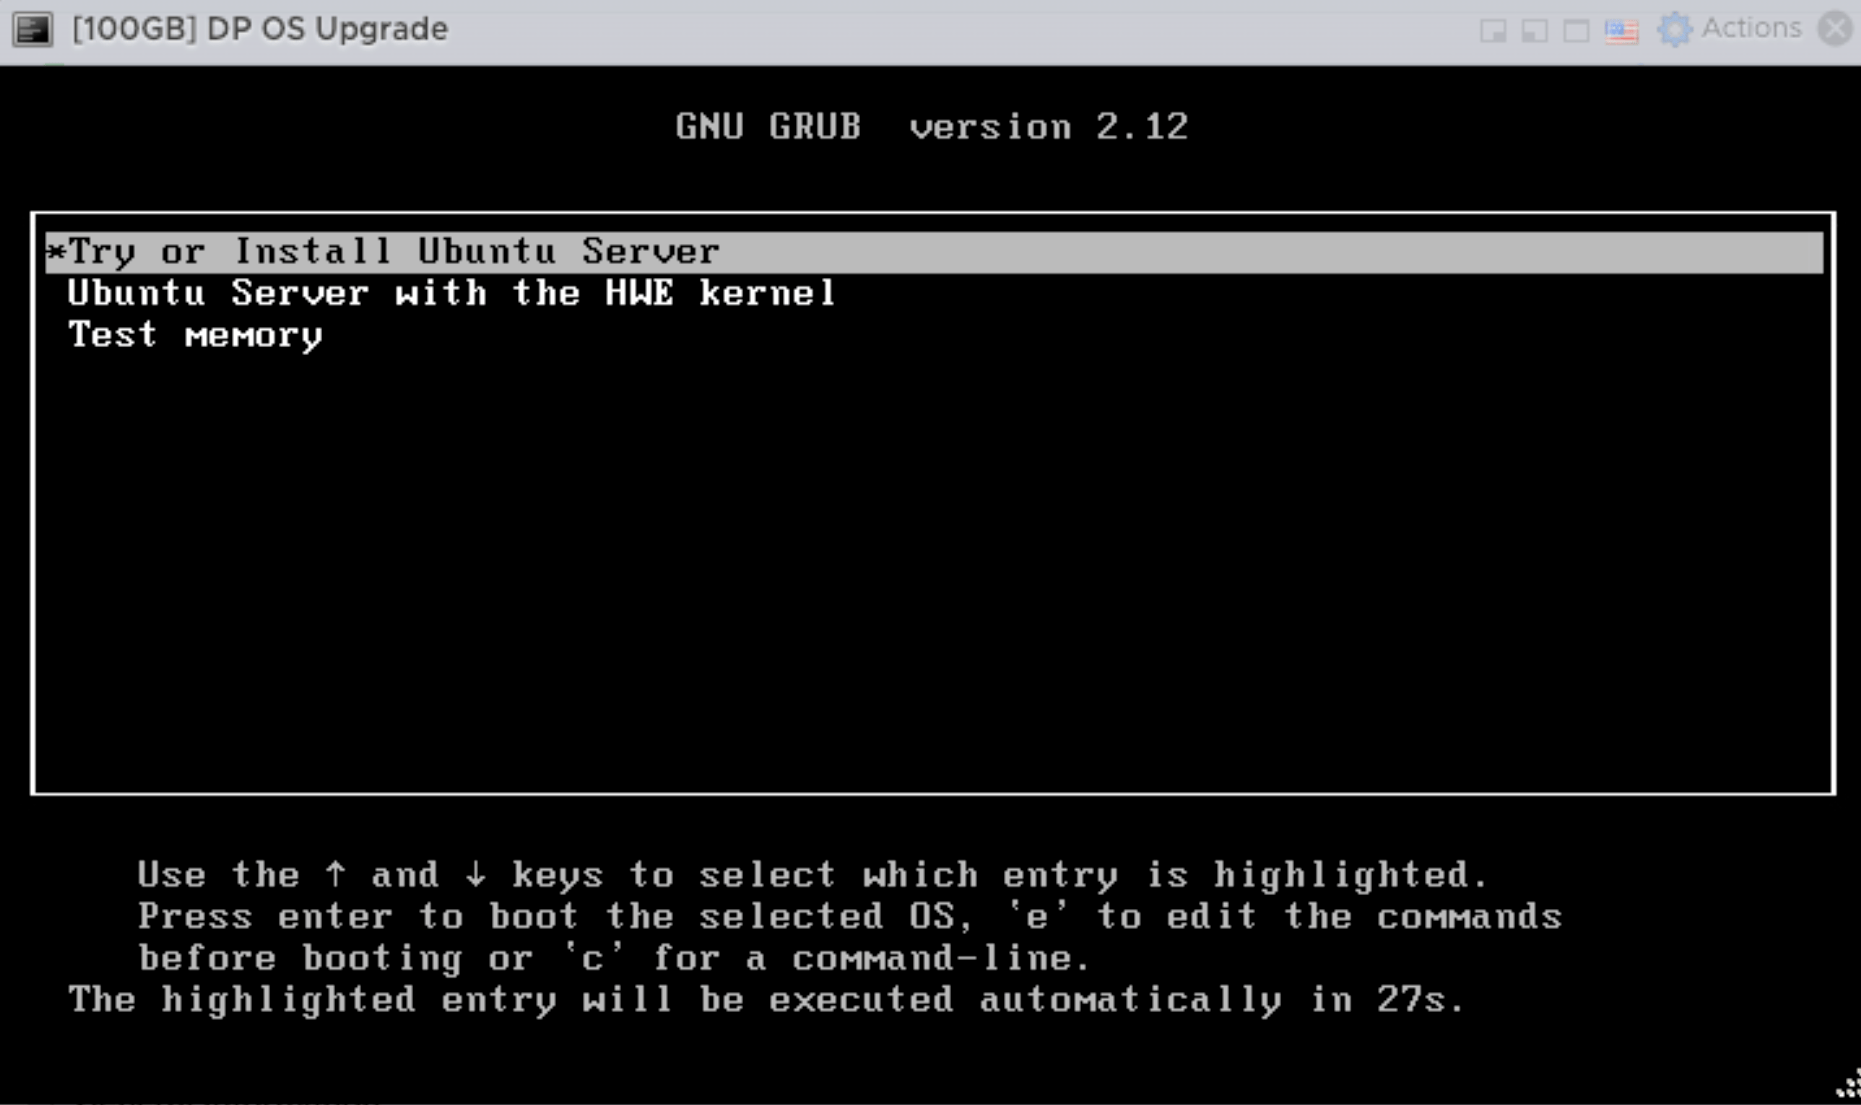
VM을 부팅하고 **Try or Install Ubuntu Server**를 선택합니다.
## Step 2 — Ubuntu Server Installer 시작
VM을 부팅하고 **Try or Install Ubuntu Server**를 선택합니다.
 고객 환경에 맞게 Language, Keyboard, Network 화면을 순서대로 설정합니다.
## Step 3 — 전체 Disk와 LVM 사용
**Guided storage configuration**에서 설치 Disk와 LVM을 선택합니다.
고객 환경에 맞게 Language, Keyboard, Network 화면을 순서대로 설정합니다.
## Step 3 — 전체 Disk와 LVM 사용
**Guided storage configuration**에서 설치 Disk와 LVM을 선택합니다.
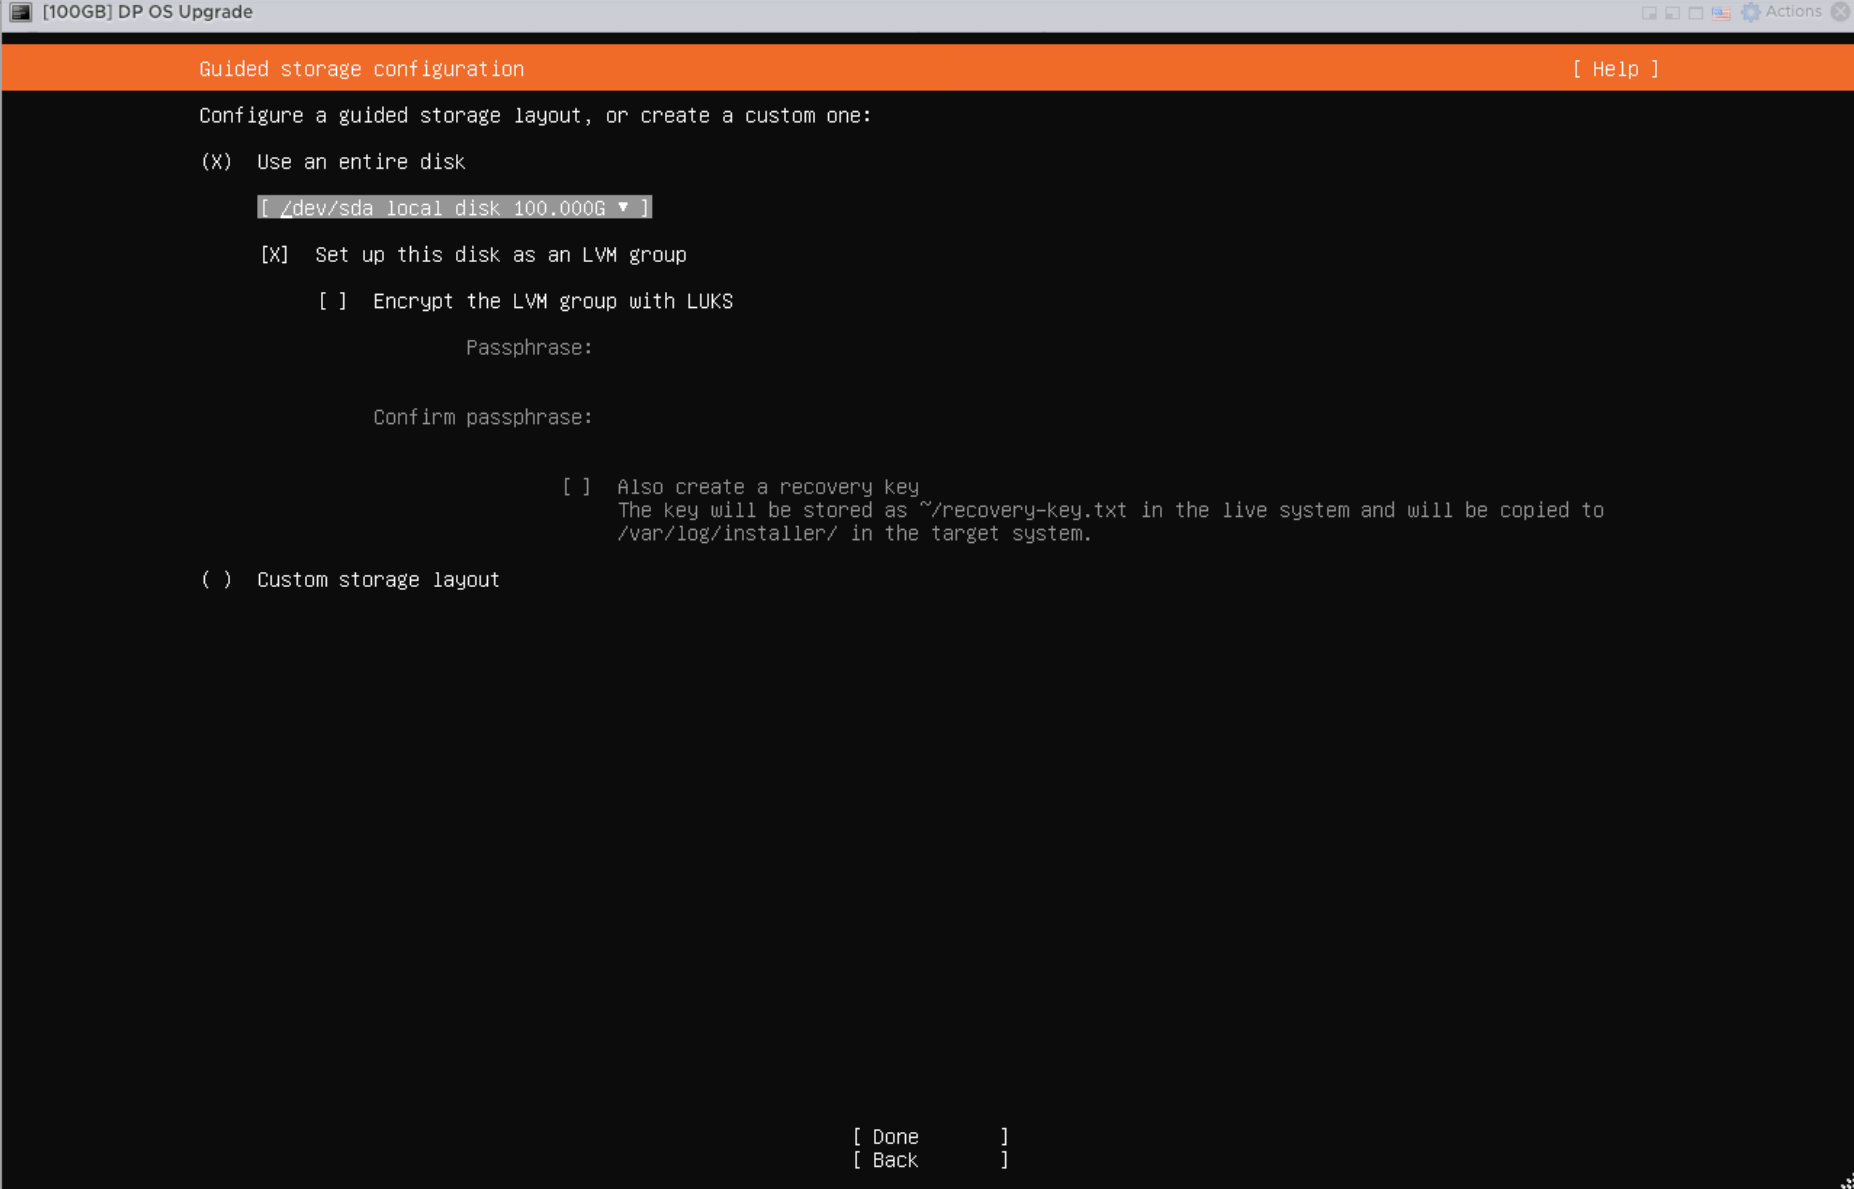 Ubuntu Installer는 초기 Root Logical Volume을 전체 Volume Group의 일부만 사용하도록 만들 수 있습니다. 100 GB Disk의 절반가량이 사용되지 않은 상태로 남지 않도록 확인하십시오.
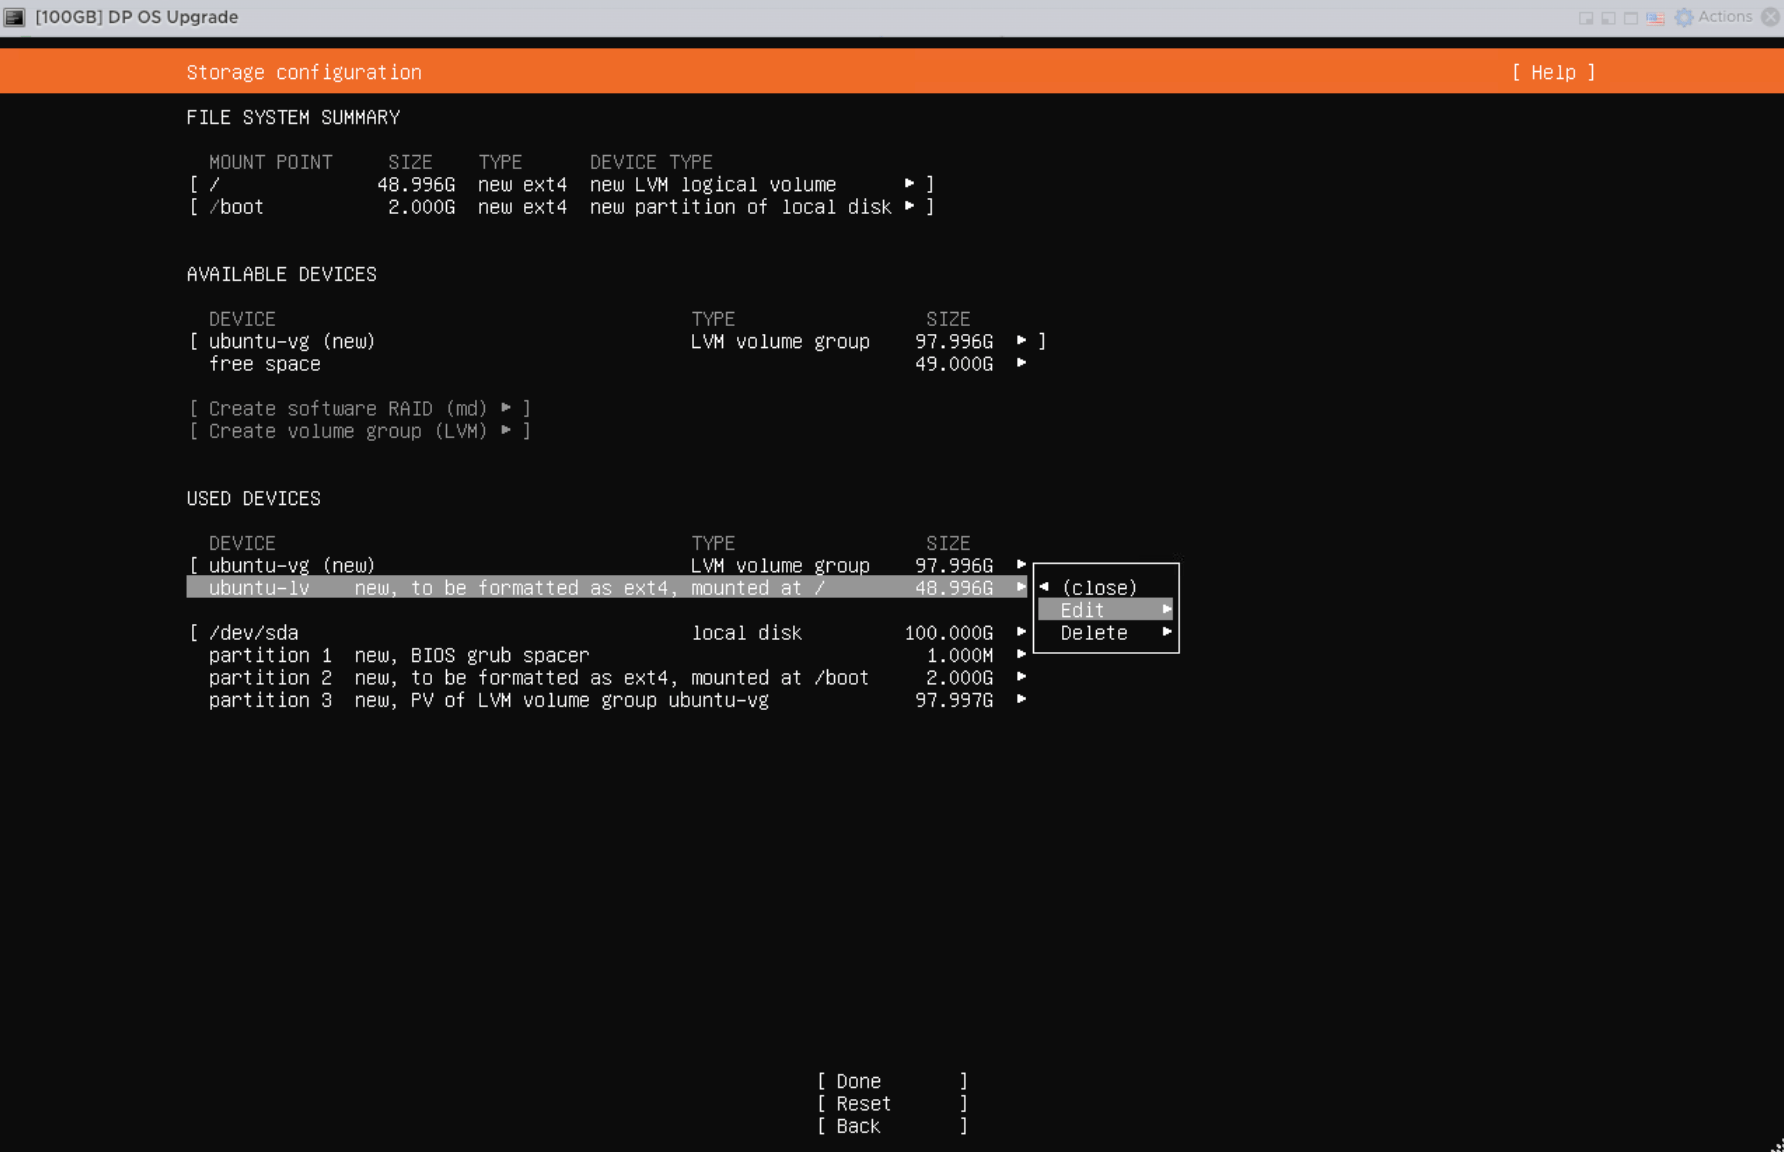 Root Logical Volume을 선택하고 **Edit**를 선택한 뒤 사용 가능한 공간 대부분을 사용하도록 크기를 늘립니다.
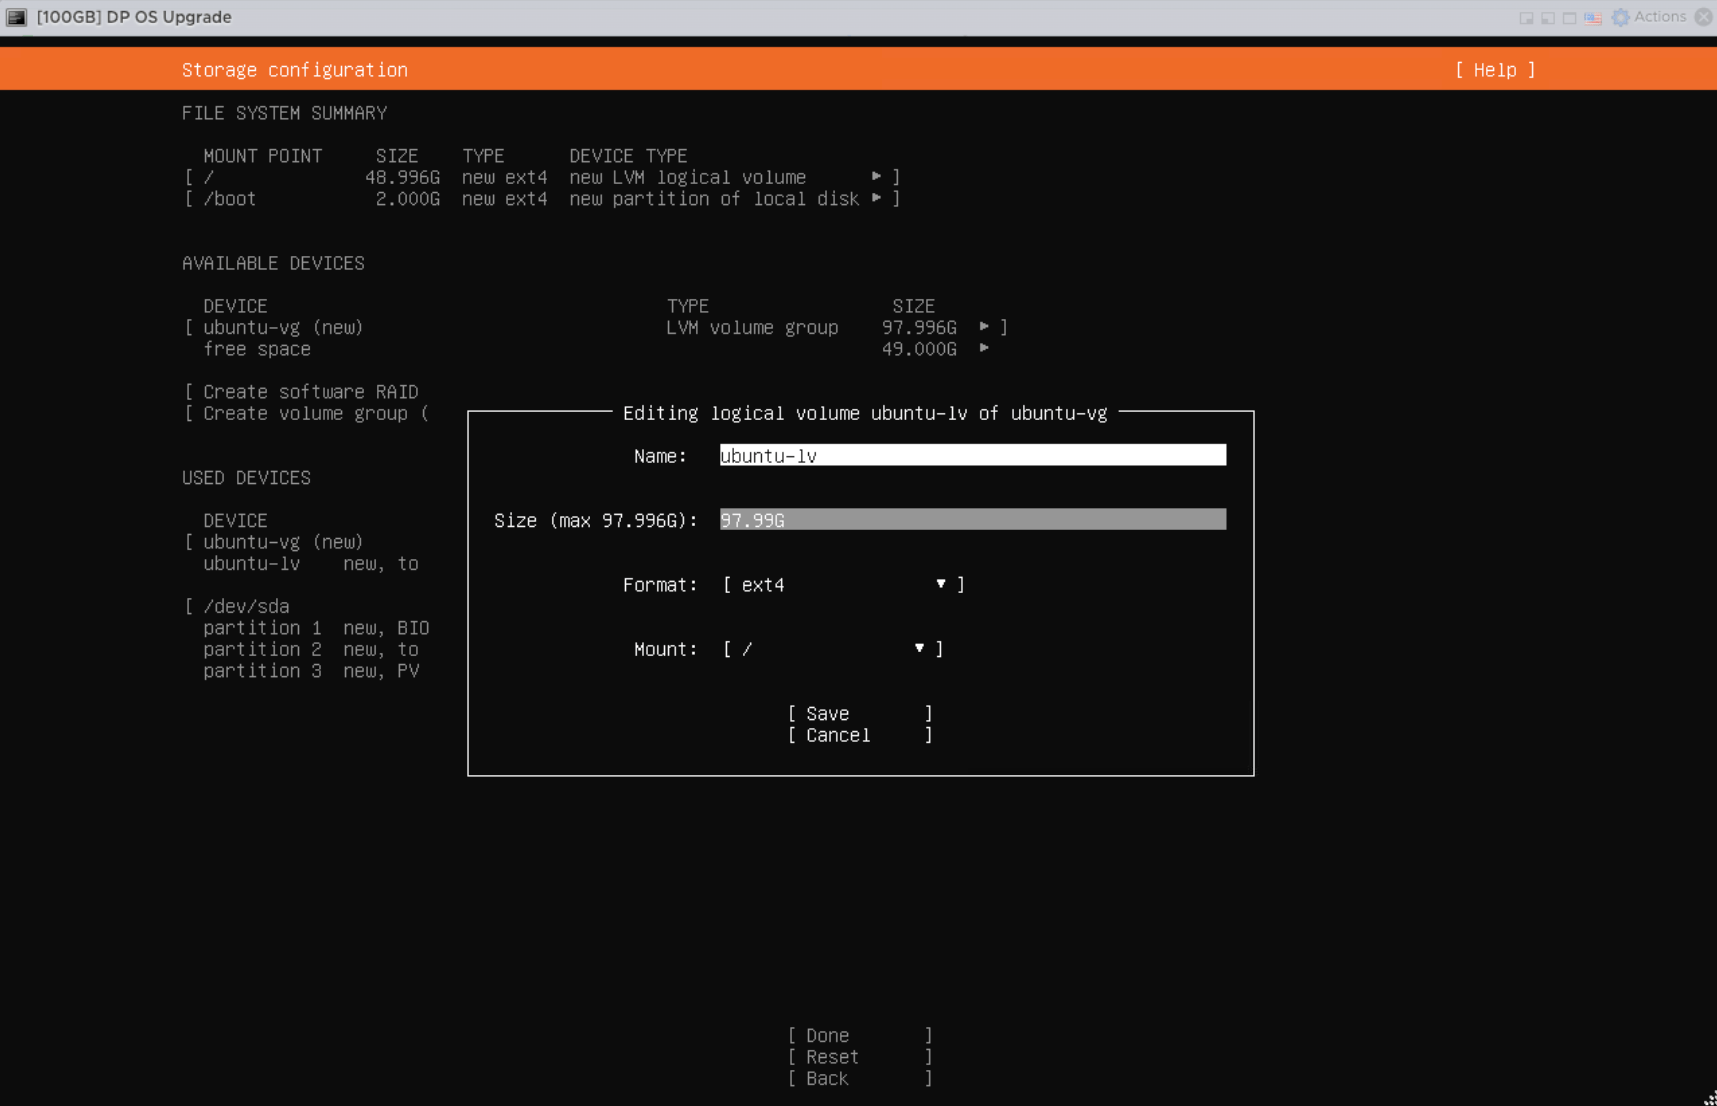 Root Filesystem이 사용 가능한 Disk 공간을 정상적으로 사용하는지 확인합니다.
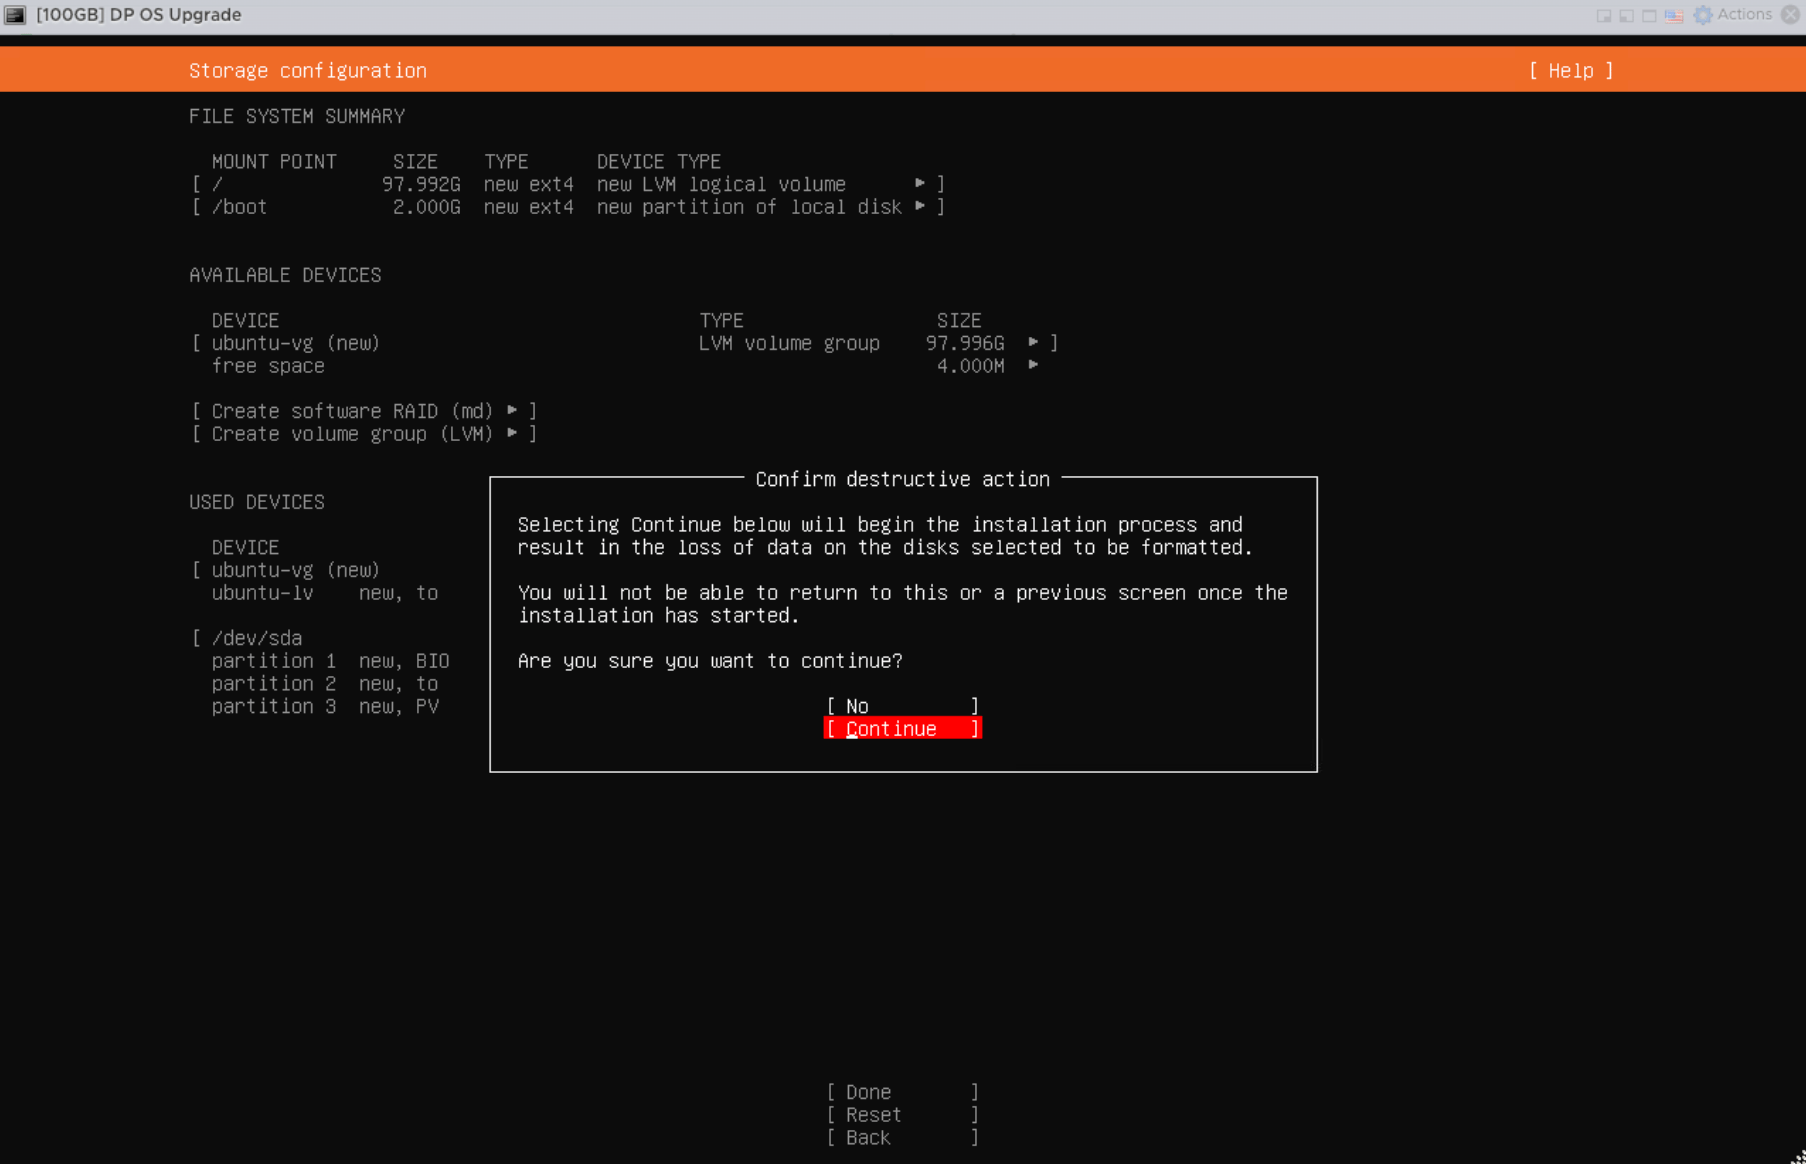
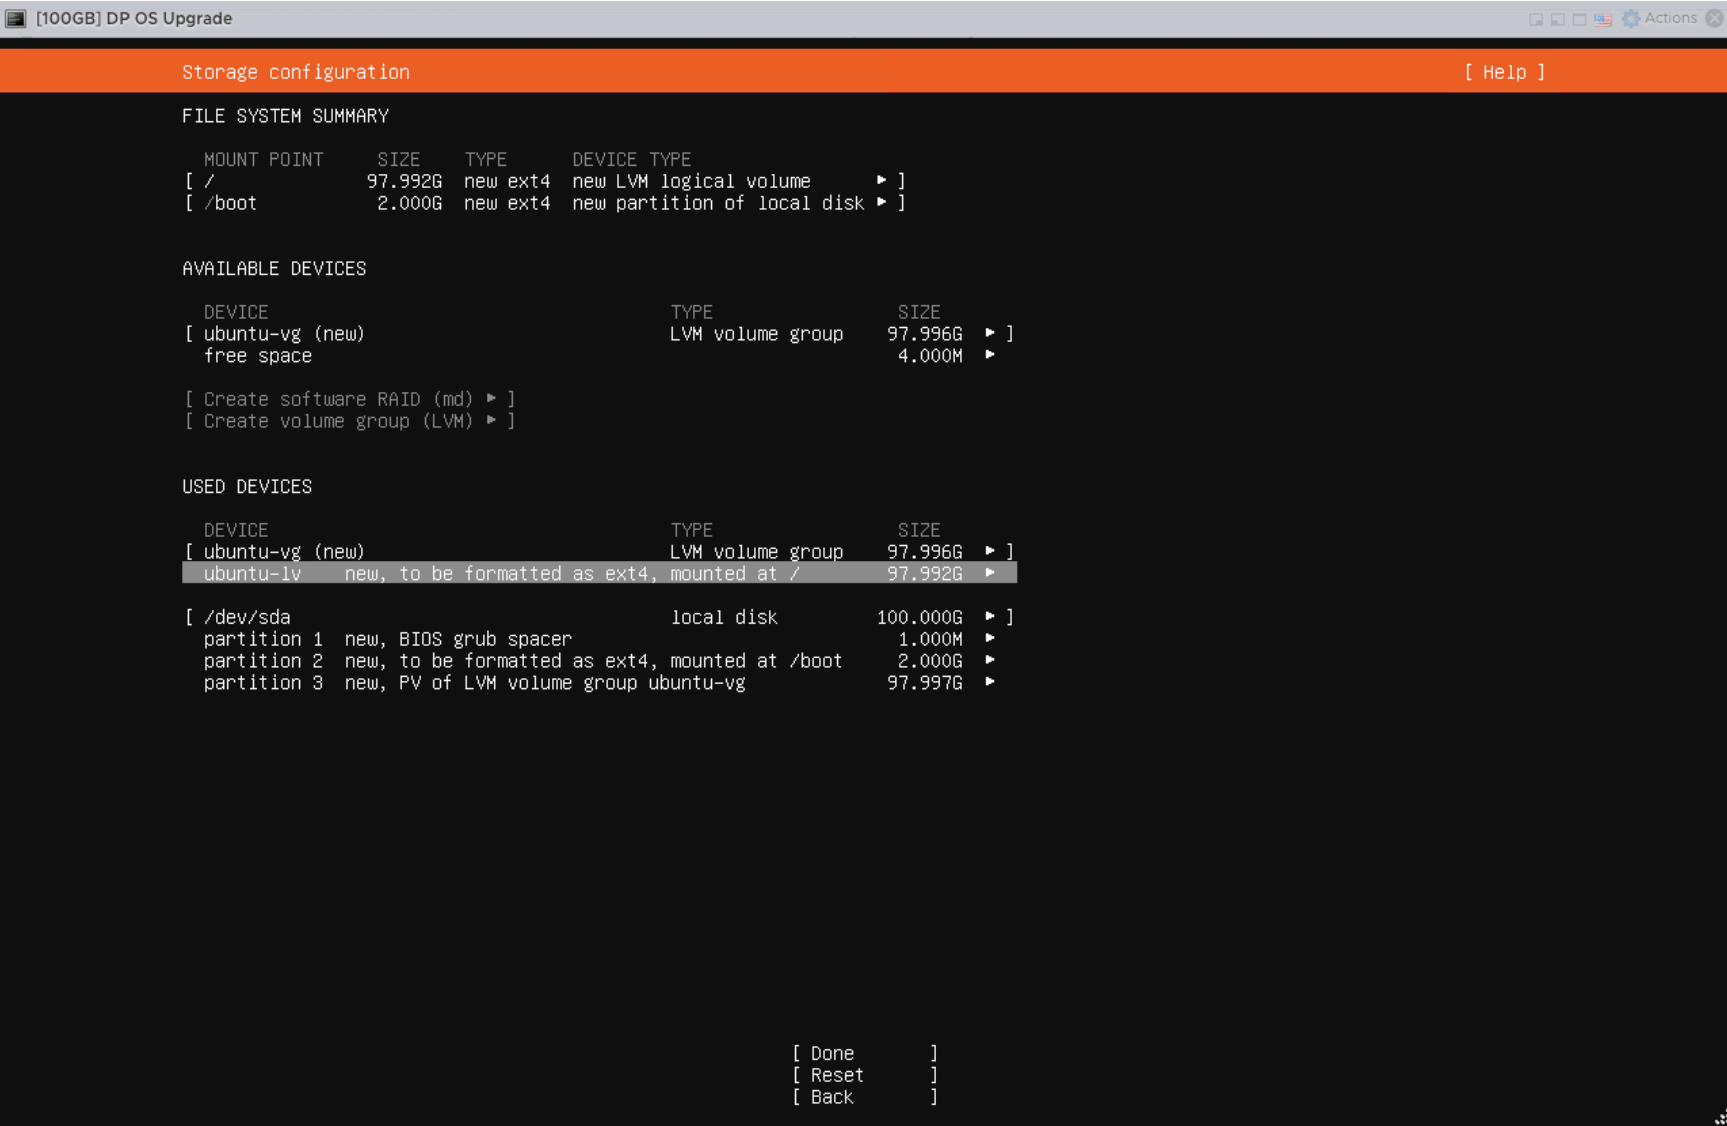 그 다음 **Done**을 선택하고 Disk Format 작업을 확인합니다.
 ## Step 4 — 관리자 계정 생성
Local Administrator 계정을 생성합니다. Screenshot에서는 `aella`를 예시로 사용합니다.
## Step 4 — 관리자 계정 생성
Local Administrator 계정을 생성합니다. Screenshot에서는 `aella`를 예시로 사용합니다.
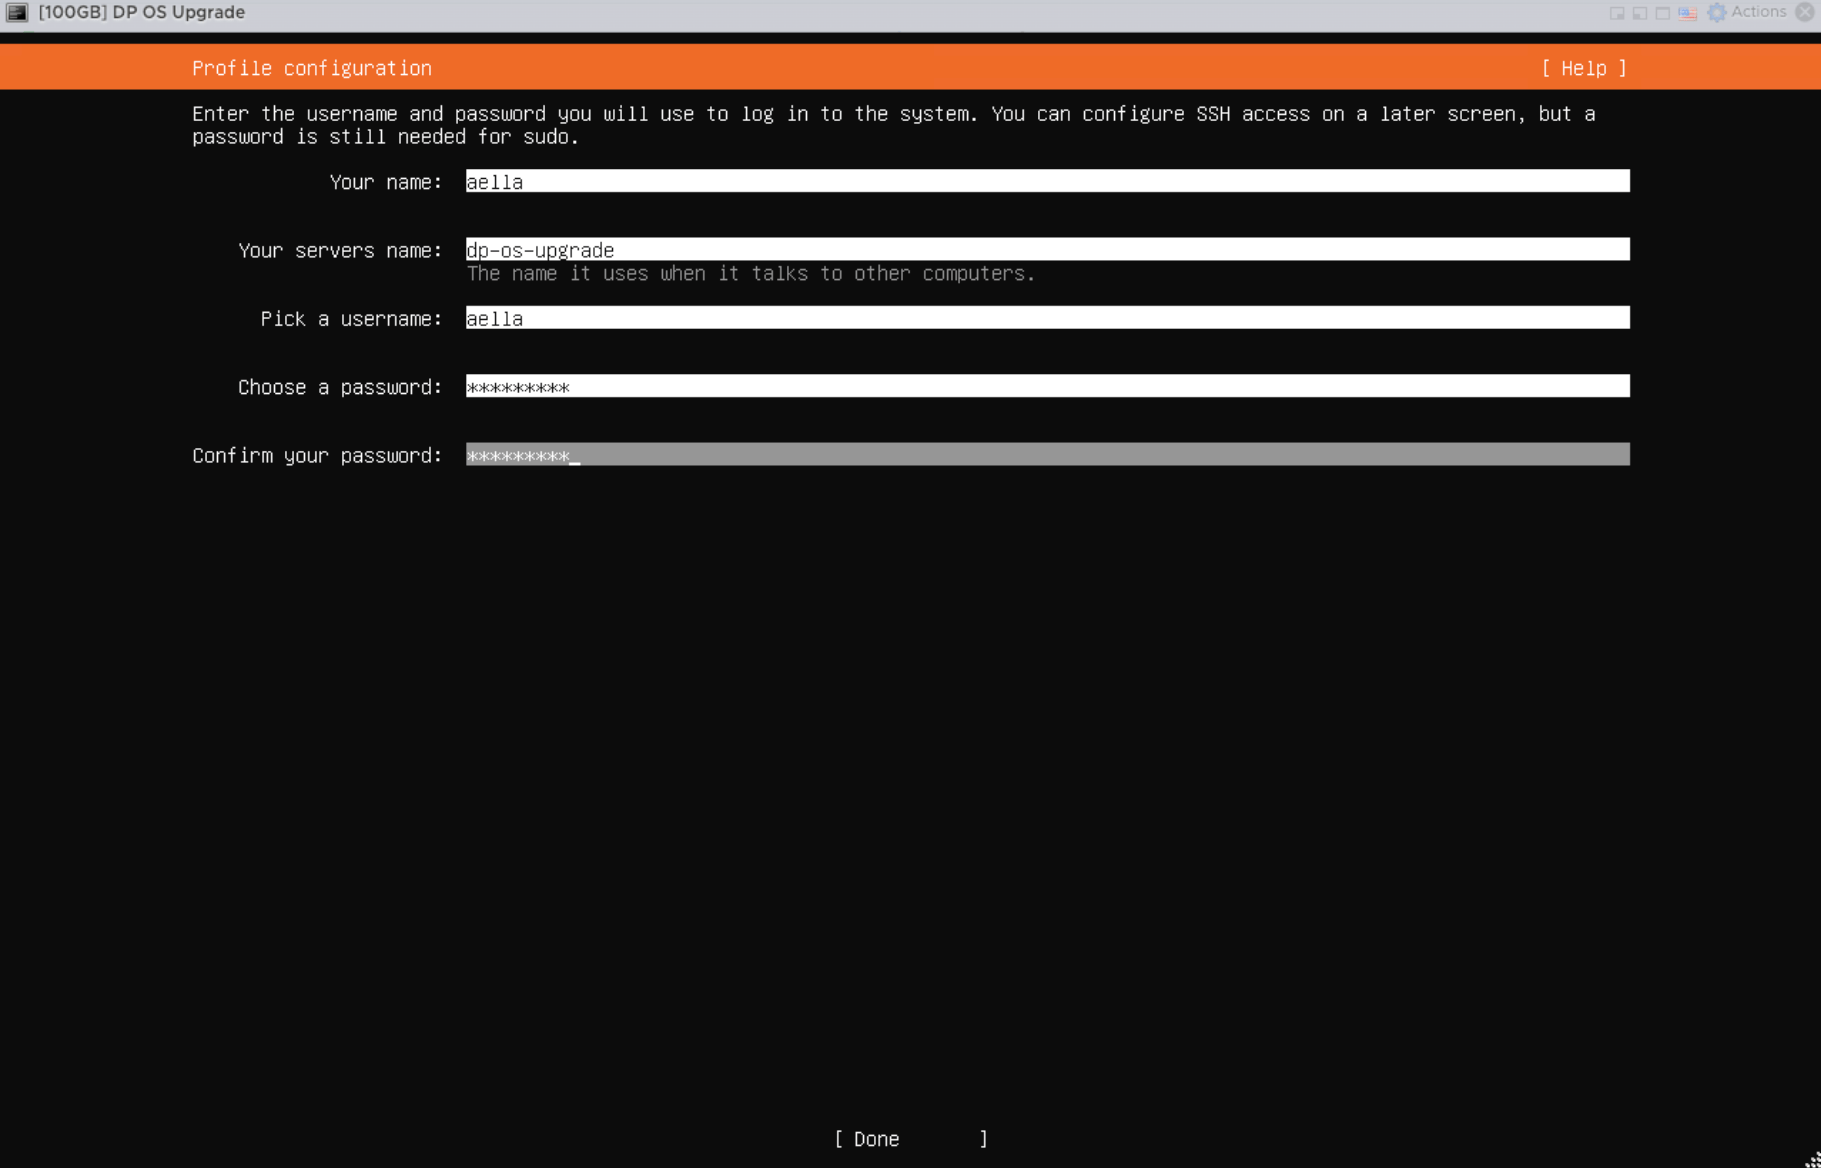 실제 환경에서 승인된 Hostname, Password, Account Policy를 사용하십시오. 문서의 예시 Password를 그대로 사용하지 마십시오.
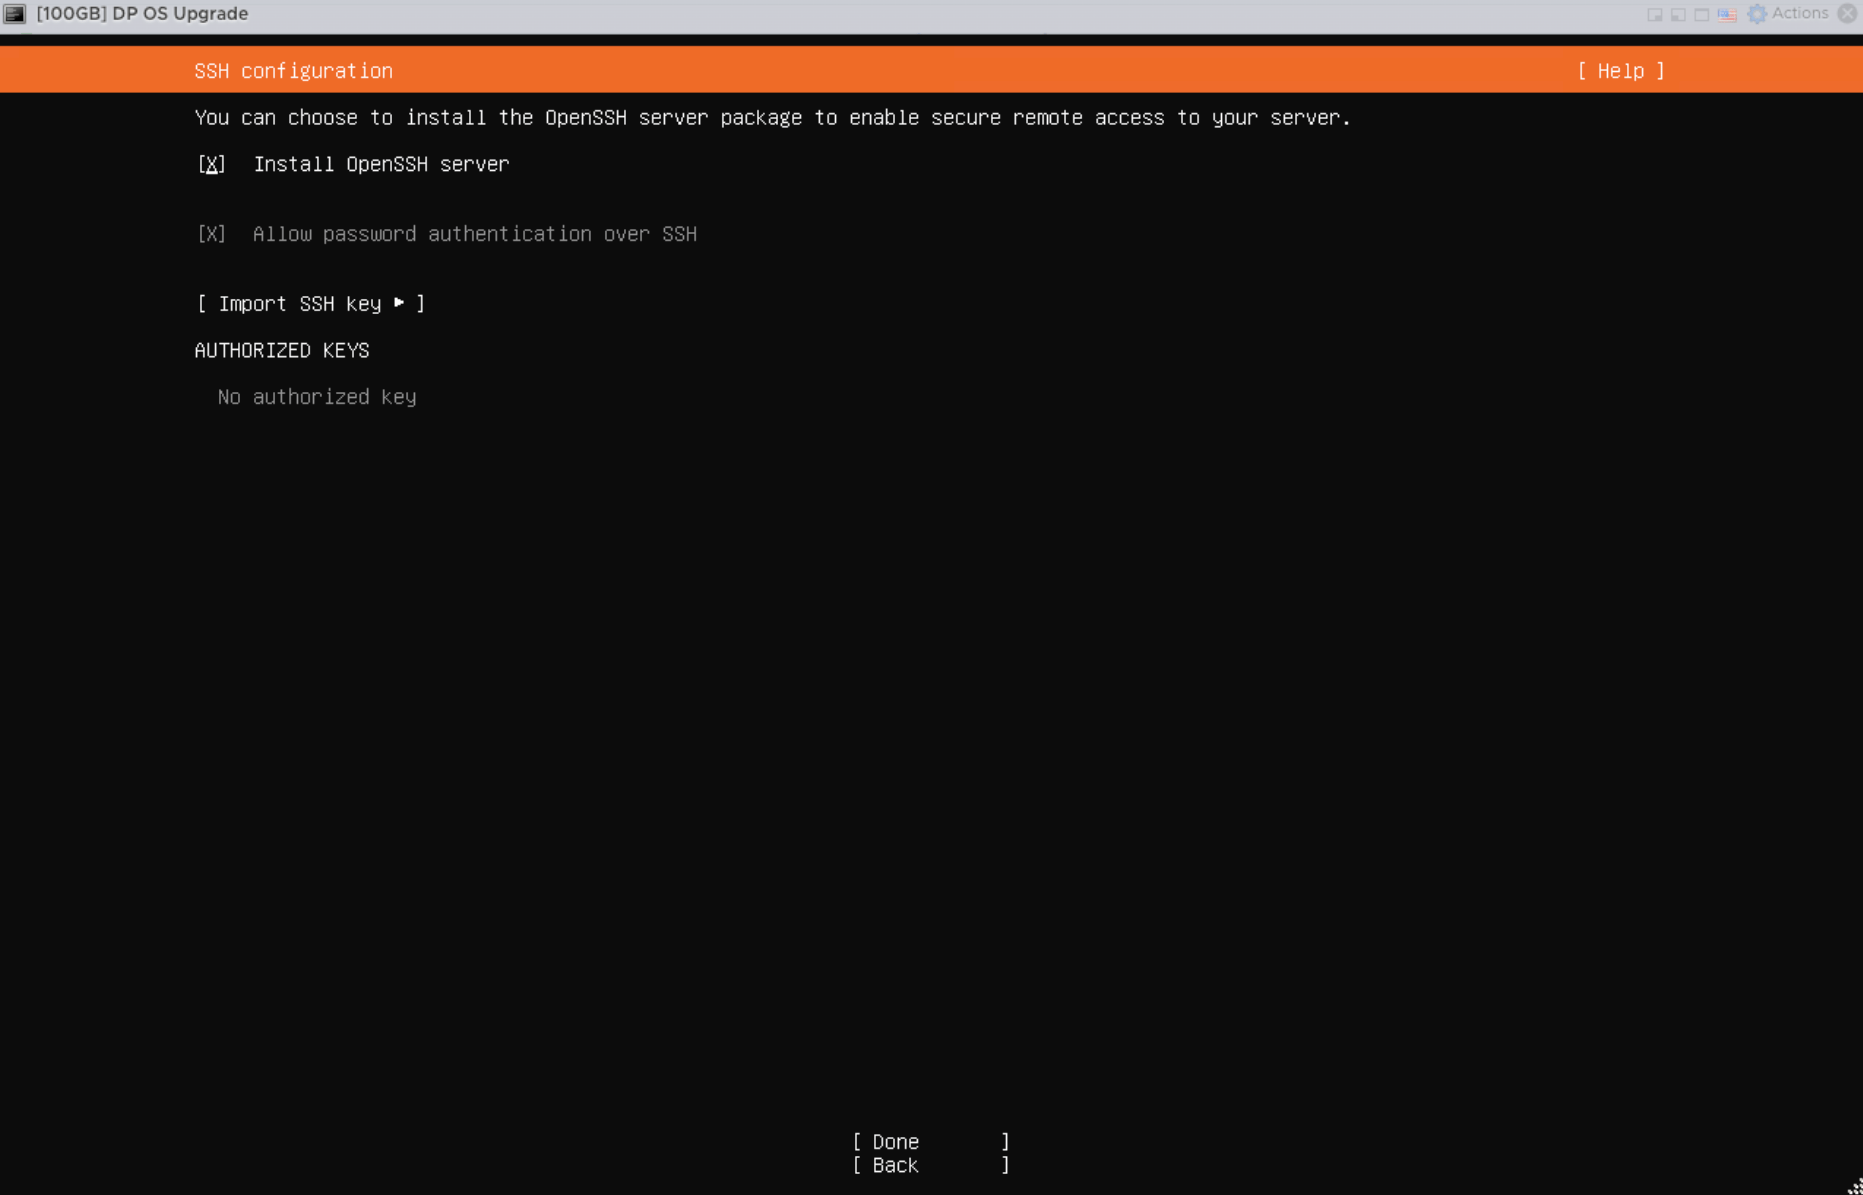
## Step 5 — OpenSSH Server 설치
설치 완료 후 원격 관리가 가능하도록 **Install OpenSSH server**를 선택합니다.
실제 환경에서 승인된 Hostname, Password, Account Policy를 사용하십시오. 문서의 예시 Password를 그대로 사용하지 마십시오.
## Step 5 — OpenSSH Server 설치
설치 완료 후 원격 관리가 가능하도록 **Install OpenSSH server**를 선택합니다.
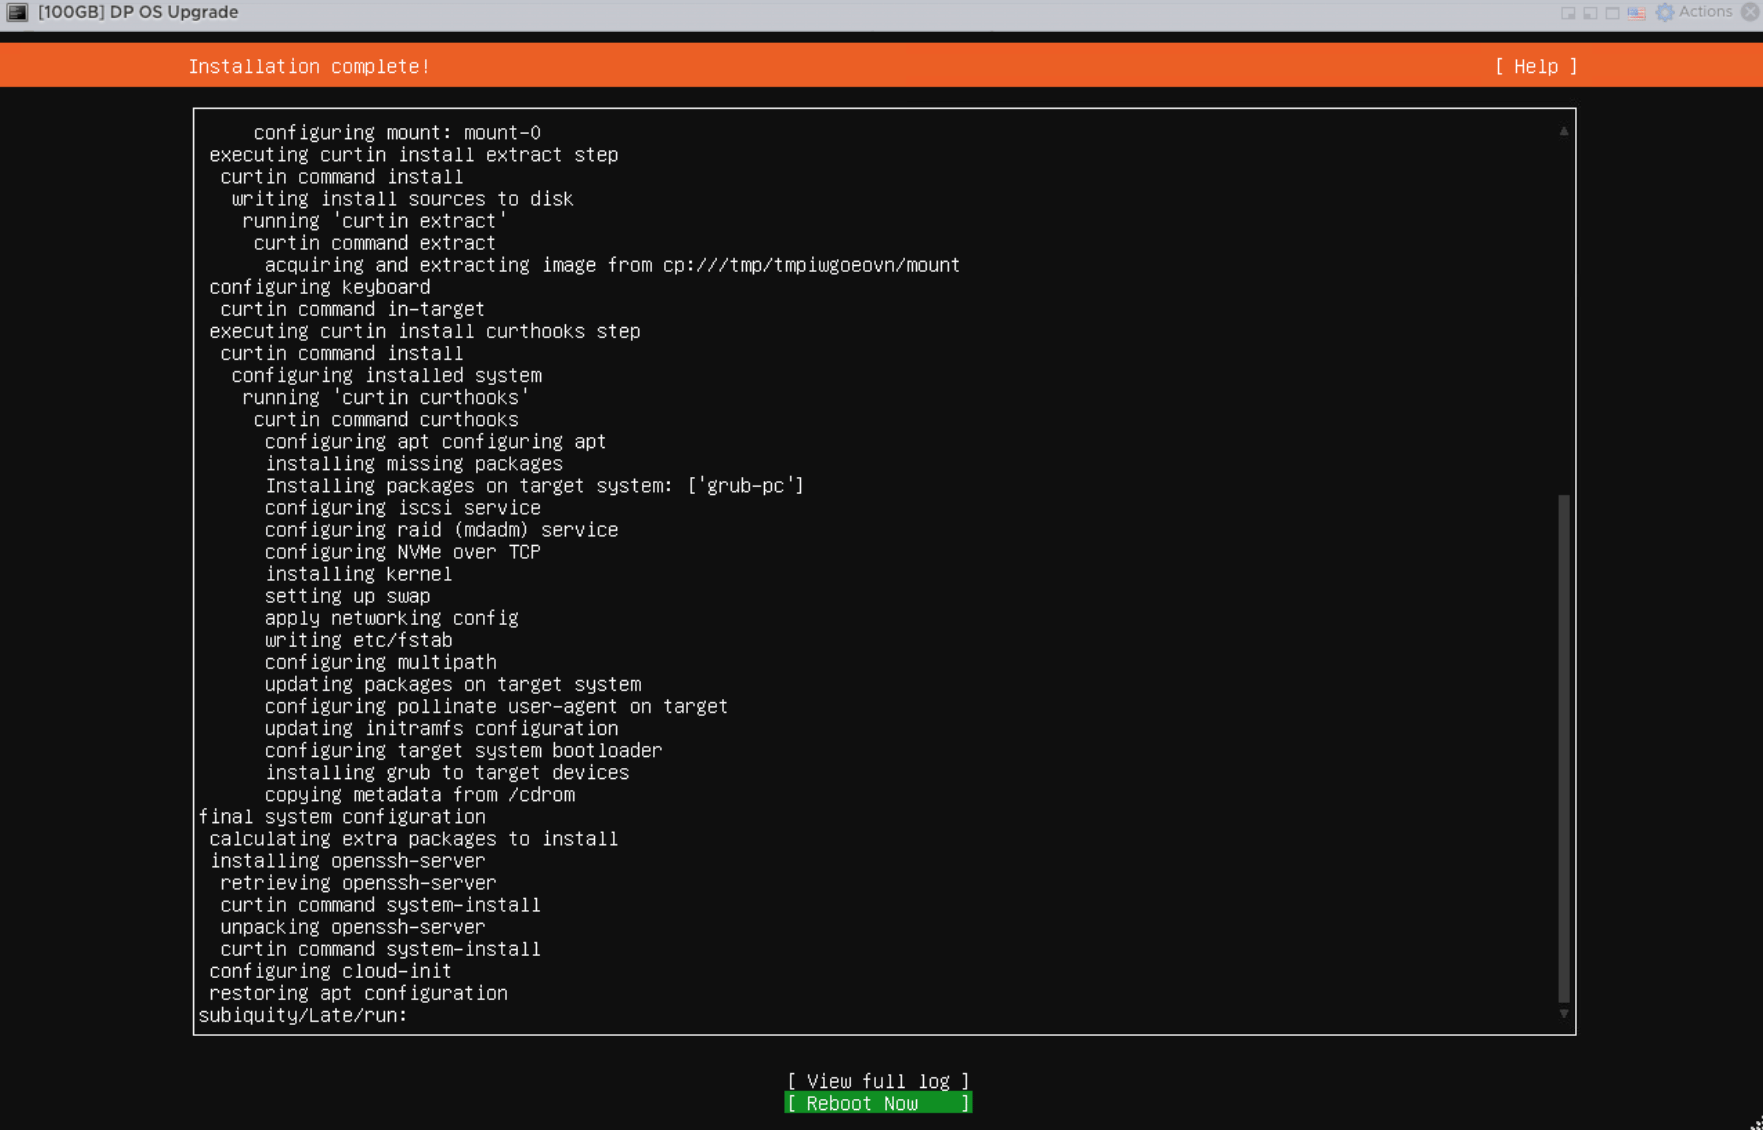
 ## Step 6 — 설치 완료 후 Reboot
설치가 완료되면 **Reboot Now**를 선택합니다. Hypervisor에서 필요한 경우 설치 ISO를 분리합니다.
## Step 6 — 설치 완료 후 Reboot
설치가 완료되면 **Reboot Now**를 선택합니다. Hypervisor에서 필요한 경우 설치 ISO를 분리합니다.
 ## Step 7 — 설치된 서버 검증
재부팅 후 로그인하여 다음을 실행합니다.
```bash theme={null}
cat /etc/os-release
df -h /
ip -br addr
sudo systemctl status ssh --no-pager
```
다음을 확인합니다.
* Ubuntu가 **24.04**로 표시됨
* Root Filesystem이 예상 용량을 사용하고 충분한 여유 공간이 있음
* 사용할 IPv4 주소가 Active 상태임
* SSH가 Active 상태임
* IP 주소가 고정되어 있고 대상 DP Network에서 접근 가능함
## Step 8 — SSH Client KeepAlive 설정
Mirror 준비와 업그레이드 작업은 SSH Terminal이 오랫동안 Idle 상태가 될 수 있습니다. 중간 Firewall, NAT 장비 또는 Idle Session 정책으로 연결이 끊어질 가능성을 줄이기 위해 **Mirror Server와 DP Host에 접속하는 SSH Client**에 KeepAlive를 설정하십시오.
OpenSSH를 사용하는 경우 작업자 PC의 `~/.ssh/config`에 Host별 설정을 추가합니다.
```sshconfig theme={null}
Host
ServerAliveInterval 60
ServerAliveCountMax 5
```
일회성 접속에는 다음 옵션을 사용할 수 있습니다.
```bash theme={null}
ssh -o ServerAliveInterval=60 -o ServerAliveCountMax=5 @
```
SSH KeepAlive는 Idle Session Timeout을 줄이는 데 도움을 줍니다. Ubuntu Release Hop 중 DP가 재부팅될 때 발생하는 정상적인 SSH Disconnect까지 막아주는 것은 아닙니다. 정상 재부팅 후 다시 접속하여 현재 Upgrade Procedure가 출력한 다음 단계부터 계속하십시오.
## Network 참고
준비 단계에서 Mirror Server는 GitHub, Cloudflare R2, ACPS, Ubuntu Bootstrap Destination으로 Outbound HTTPS 통신이 필요합니다. 실제 DP 업그레이드 중 대상 DP는 **HTTP/TCP 80**으로 Mirror Server에서 준비된 파일을 가져옵니다.
## 다음 단계
[**3. Mirror Server 설치 및 준비**](/ko/runbook/mirror-server-setup)로 진행하십시오.
## Step 7 — 설치된 서버 검증
재부팅 후 로그인하여 다음을 실행합니다.
```bash theme={null}
cat /etc/os-release
df -h /
ip -br addr
sudo systemctl status ssh --no-pager
```
다음을 확인합니다.
* Ubuntu가 **24.04**로 표시됨
* Root Filesystem이 예상 용량을 사용하고 충분한 여유 공간이 있음
* 사용할 IPv4 주소가 Active 상태임
* SSH가 Active 상태임
* IP 주소가 고정되어 있고 대상 DP Network에서 접근 가능함
## Step 8 — SSH Client KeepAlive 설정
Mirror 준비와 업그레이드 작업은 SSH Terminal이 오랫동안 Idle 상태가 될 수 있습니다. 중간 Firewall, NAT 장비 또는 Idle Session 정책으로 연결이 끊어질 가능성을 줄이기 위해 **Mirror Server와 DP Host에 접속하는 SSH Client**에 KeepAlive를 설정하십시오.
OpenSSH를 사용하는 경우 작업자 PC의 `~/.ssh/config`에 Host별 설정을 추가합니다.
```sshconfig theme={null}
Host
ServerAliveInterval 60
ServerAliveCountMax 5
```
일회성 접속에는 다음 옵션을 사용할 수 있습니다.
```bash theme={null}
ssh -o ServerAliveInterval=60 -o ServerAliveCountMax=5 @
```
SSH KeepAlive는 Idle Session Timeout을 줄이는 데 도움을 줍니다. Ubuntu Release Hop 중 DP가 재부팅될 때 발생하는 정상적인 SSH Disconnect까지 막아주는 것은 아닙니다. 정상 재부팅 후 다시 접속하여 현재 Upgrade Procedure가 출력한 다음 단계부터 계속하십시오.
## Network 참고
준비 단계에서 Mirror Server는 GitHub, Cloudflare R2, ACPS, Ubuntu Bootstrap Destination으로 Outbound HTTPS 통신이 필요합니다. 실제 DP 업그레이드 중 대상 DP는 **HTTP/TCP 80**으로 Mirror Server에서 준비된 파일을 가져옵니다.
## 다음 단계
[**3. Mirror Server 설치 및 준비**](/ko/runbook/mirror-server-setup)로 진행하십시오.